CS8, Spring 2017
Lab09:
Creating an image
Goals for this lab
By the time you have completed this lab, you and your lab partner should be able to
- Distinguish colors based on their RGB components
- Create interesting images
Step by Step Instructions
BEFORE YOU BEGIN: Fill out TA evaluations
Please spend the first 10-15 minutes of today's lab filling out your TA evaluation forms. Thank you.
Step 0: Get together with your assigned lab partner.
Choose the first pilot. This lab's pilot should log in and create a lab09 directory under your cs8 folder. You will work in this account for the rest of the lab. If your partner is more than 5 minutes late, ask the TA to pair you with someone else for this week.
Step 1: Start IDLE, and open a new window for function definitions
After IDLE starts, select "File=>New Window" and add a comment at the top of this new file like usual:
# lab09.py
# Name: your name(s), today's date
# some image processing functions
Then copy and paste the following code into your file:
import sys
sys.path.append('/cs/class/cs8c/lib')
import cImage
image = cImage.EmptyImage(300,300)
window = cImage.ImageWin("My Image",300,300)

def setPixels(pixel, x=100, y=100, w=100, h=100):
    for xCoor in range(x, x+w):
        for yCoor in range(y, y+h):
            image.setPixel(xCoor,yCoor,pixel)

def show():
    image.draw(window)
Then save it as lab09.py inside your lab09 directory.
When you run it, an image and a window will be created. Drag the window away from the Python shell window, so you will be able to see the effects of using the functions. Notice the setPixels function has some default function arguments - if not specified, this function will always fill a 100x100-pixel rectangle with its upper left corner at 100 pixels from both the top and left sides of the image. You can specify different x and y starting coordinates, and/or different dimensions (w and h), either by listing the optional parameters in order or by naming and assigning as in w=30 below. Invoking show() will display the image.
After you run the module, type the following in the python shell:
>>> setPixels(cImage.Pixel(150,150,0))
>>> show()
You should see a gold-colored square in the center of the image - this is how you can try color combinations. And you can specify different positions and sizes - e.g., first a tall black rectangle at a new x and y position, then a short white rectangle at the default position:
>>> setPixels(cImage.Pixel(0,0,0), 150, 110, 20, 60)
>>> setPixels(cImage.Pixel(255,255,255), w=30, h=10)
>>> show()
Step 2: Try out some colors
Now, using the functions above to test out your ideas, find good rgb values for each of the following colors:
- red
- pink
- yellow
- brown
- light blue, and
- dark blue
blackPixel = cImage.Pixel(0,0,0)
whitePixel = cImage.Pixel(255,255,255)
For the rest of this lab, you can use those variable names instead of writing out "cImage.Pixel(blah, blah, blah)." Feel free to make as many names as you would find useful. For example, the calls to setPixels at the end of Step 1 above could now be simplified as follows:
>>> setPixels(blackPixel, 150, 110, 20, 60)
>>> setPixels(whitePixel, w=30, h=10)
Step 3 - Create an interesting image
First switch roles between pilot and navigator.Write a function to create an image - it can be anything you want to draw! Use the image named image that is created when you run the lab09.py module. You can either set pixels in the image manually using the image.setPixel method, and/or by using the setPixels method you used in Step 2. You may begin by trying things out directly in the Python shell, but the end result must be a function that you can run if the TA asks you to do so.
Need some ideas? All of the following images were created by using the setPixels function in systematic ways:
def scale():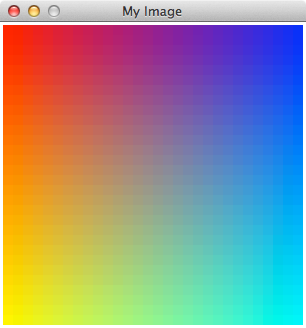
Inside nested for loops, red changes from 255 at left to 0 at right, blue changes in the opposite direction, and green increases from 0 to 255 top to bottom.
def chessboard():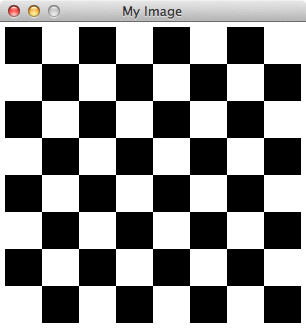
Inside nested for loops, alternating black and white rectangles are drawn.
def pyramid(pixel):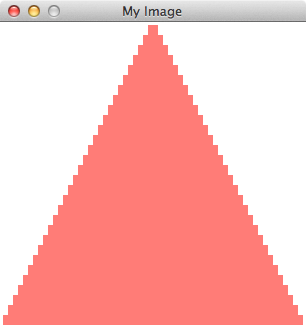
Just one for loop is used to draw rectangles that increase in width from top to bottom, filled by the Pixel passed as an argument. This image resulted from the following call:pyramid(pinkPixel).
Write and test the function that draws your creation. Really, it can be anything, not just regular patterns like these examples. Use show() to view it, and then leave the image window open for the TA to see.
Step 4: Show off your work and get credit for the lab
| Get your TA's attention to inspect your work, and to record your lab completion. |
You may leave early this week! But please wait patiently until the TA checks off your work and dismisses you. Of course, you may stay and play with Python and images (or whatever) for awhile longer too. Also consider asking someone else if they need help finishing.
Step 4a. ONLY IF YOU RAN OUT OF TIME TO HAVE THE TA INSPECT YOUR WORK
If you must complete this assignment at CSIL, then submit it with the turnin program. You MUST have both your name and your partner's name in the file in order to receive credit. Remember that the original pilot needs to do this step, since that is whose account you have been using in Phelps 3525.
Bring up a terminal window on CSIL, and cd into the original pilot's cs8 directory, and cd again into the lab09 directory. Then type the following:
turnin Lab09@cs8c lab09.pyRespond "yes" when the program asks if you want to turn in (be sure to read the list of files you are turning in), and then wait for the message indicating success.
Evaluation and Grading
Each student must accomplish the following to earn full credit for this lab:- Turn in a complete and accurate Hw9.
- lab09.py is saved, it contains the required Pixel definitions from Step 2, and the function to create an image from Step 3 is working properly.
- ONLY IF STEP 4a IS NECESSARY - lab09.py has been turned in
Deadline for after-lab submission: Tonight at 11:59pm.
Note that to be eligible for late turn-in with credit, you MUST have attended your entire lab period until dismissed.
Prepared by Diana Franklin and Michael Costanzo.